Microsoft Security Essentials Installation Guide For Windows Server
-
Firstly you’ll want to download Microsoft Security Essentials
onto your Windows server. Select the language of your choice and either
32-bit or 64-bit depending on the architecture your server operating
system is using.
-
Save the mseinstall.exe file somewhere locally on the server, do not
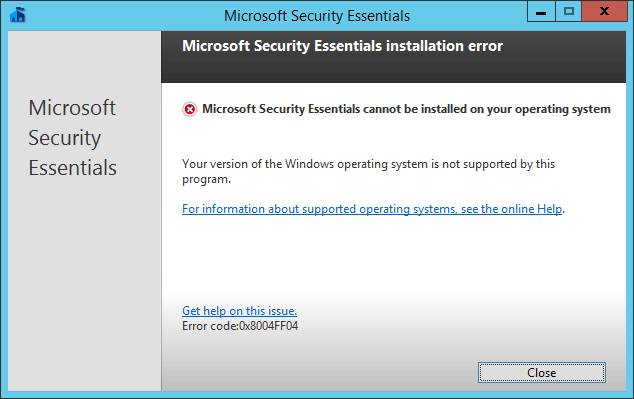
simply run it as by default the installation will fail with the
following error:
Microsoft Security Essentials cannot be installed on your operating system.

Your version of the Windows operating system is not supported by this program.

Error code:0x8004FF04
-
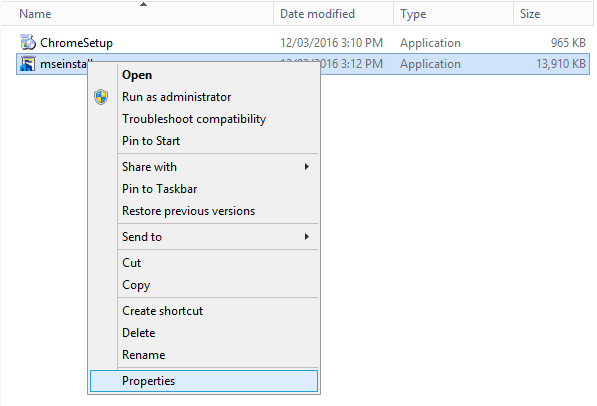
To get around this error message, right click the mseinstall.exe file and select properties.
-
From the properties window, select the compatibility tab. Within the
compatibility tab tick “Run this program in compatibility mode for:”
under Compatibility Mode and select Windows 7 from the drop down box, as
shown.
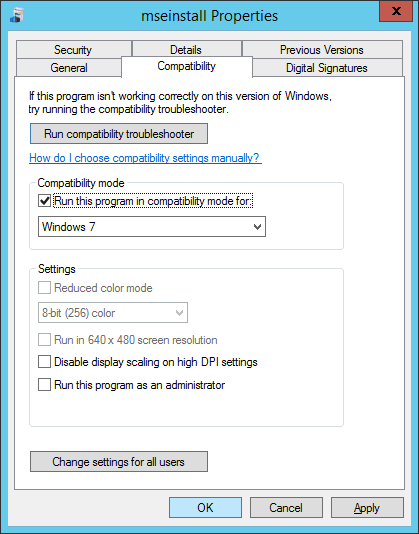
Click OK to continue. -
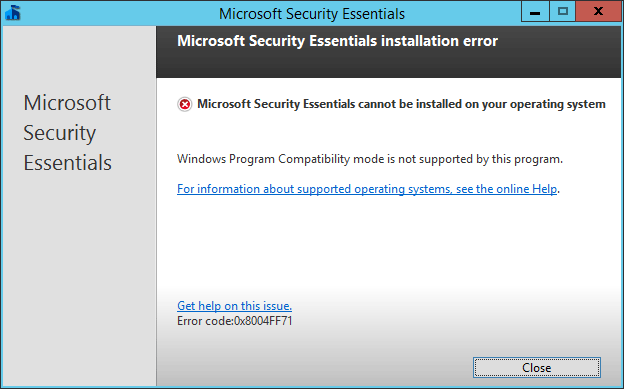
If you were to run the mseinstall.exe file at this point, you would receive a different error as shown below:
Microsoft Security Essentials cannot be installed on your operating system.

Windows Program Compatibility mode is not supported by this program.

Error code:0x8004FF71
In order to resolve this, run command prompt as administrator and enter the folder where the mseinstall.exe file is located. Run the mseinstall.exe file with the /disableoslimit flag on the end as shown below. cd C:\Users\Administrator\Downloads

-
The installation wizard should now correctly open and Microsoft Security
Essentials can now be installed and will proceed without the previous
error messages, click Next to continue and work through the installation
wizard.

-
Once the installation has completed you can optionally update and
perform a scan, this is recommended as the definitions database needs to
be kept up to date to find newer threats. An Internet connection will
be required to download any available definition updates through the
application, however these can also come through from Windows updates so if you have a WSUS server you can update from here as well. After updating a quick scan will take place.
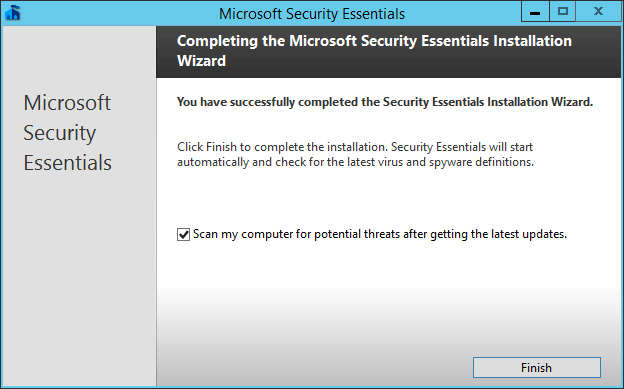
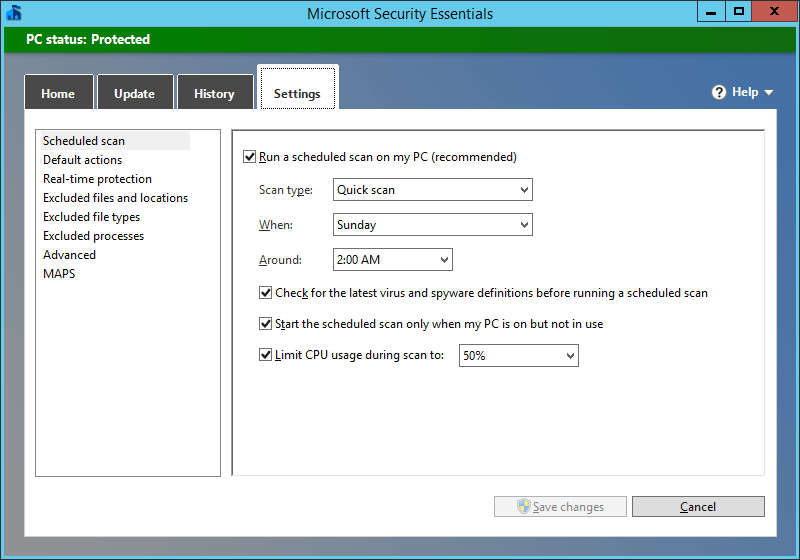
You can select the Settings tab to modify when the weekly automatic scheduled scan takes place, by default a quick scan is set to run every Sunday at 2am and will not use more than 50% of the available CPU resources.
-
Now that Microsoft Security Essentials has been successfully installed,
we will test the actual functionality of the program to ensure that it
will correctly identify a threat. To do this we will create a test EICARs file and see if the real-time protection automatically detects and quarantines it.
Essentially we are just going to open Notepad and create a .txt file
containing the test string defined on that page and then save it to the
desktop.

-
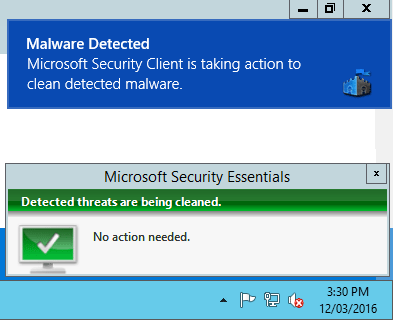
Shortly after saving the file we have been visually alerted that malware
has been detected and that Microsoft Security Client is taking action
to clean the detected malware.
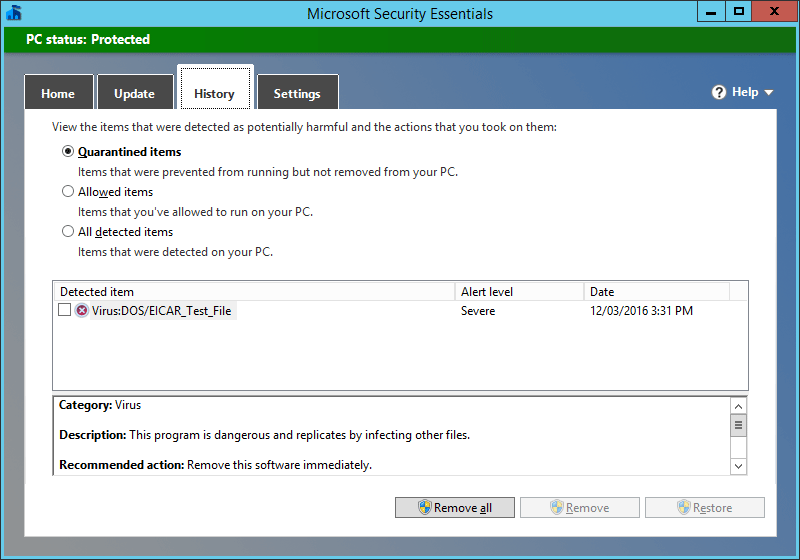
If we check the History tab of Microsoft Security Essentials we can then see the test file listed as a quarantined item, confirming that it is working correctly as intended in Windows Server 2012 R2.
Download and Install
Testing
Summary
Although not officially supported, we have successfully installed Microsoft Security Essentials (a cut down Windows Defender) in Windows Server 2012 R2 and confirmed that it is working correctly and detecting security threats.This is better than the default level of security, which is none as Windows Defender is only built into Windows 8, 8.1 and 10 client operating systems, however it is recommended that server operating systems make use of enterprise solutions such as System Center Endpoint Protection (SCEP) or some other option available from some security vendor.